 Storm clouds have moved in towards late afternoon each of the past few days. Sometimes rain falls, sometimes it doesn't. Southwest Montana July 12, ...
Sunday, June 29, 2014
Dark Clouds Overhead
Storm clouds have moved in towards late afternoon each of the past few days. Sometimes rain falls, sometimes it doesn't. Southwest Montana July 12, ...
Saturday, June 28, 2014
Swineshead - Riseley - Keysoe - S'head
Led by Barry. With Gordon, Eddie, Maureen and me. Not so cold as Monday, but the wind was cold. Muddy fields made it feel like rather more than the ten miles recorded on my magic machine.

 We parked in Swineshead, a pretty village with some very old buildings – cruck-framed? Timbered houses and barns.We walked up the street and took a footpath to the left into a field of sheep, which looked as though they expected something of us – they were to be disappointed.

to be completed
We parked in Swineshead, a pretty village with some very old buildings – cruck-framed? Timbered houses and barns.We walked up the street and took a footpath to the left into a field of sheep, which looked as though they expected something of us – they were to be disappointed.to be completed
Friday, June 27, 2014
Through Brooklyn to the Bridge and back
The part I traced is 6.6 miles. I estimate the return leg, which I didn't trace was another 3 - so getting close to 10 miles today. Lunch with Leonie, near the Carousel on the waterside. Noticeably warm today, though breezy on the bridge.


 Pics and map to follow.
Pics and map to follow.
Monday, June 23, 2014
Adirondack Crack Attack, Day Two: Upper Washbowl Cliff

(Photo: a portion of Upper Washbowl Cliff, with a climber visible back in the corner, in the middle of the second pitch of Partition (5.9-).)
I know that I have no special talent for rock climbing.
I enjoy it and do it as much as I can. But since other things in my life (like marriage, children, and work) also take up lots of time, I don't really get out to climb that often. It's been an awesome year, and I've been lucky enough to take a few multi-day trips to Vegas and the 'Dacks, but even including these trips I don't think I'll get more than two dozen days on real rock in . I know that I am extremely fortunate to get this many days to play outside; two dozen probably sounds like an awful lot to some climbing dads out there. But when you're talking about making athletic progress, let's be honest: it's a joke.
It just isn't that easy to get better when you don't get out that much.
But I also have a firm belief that an ordinary guy like me, an occasional weekend warrior, can be a 5.10 climber. I don't think superhuman fitness or even perfect technique is required. A certain basic proficiency plus just enough experience should, in my opinion, get me there eventually. This year my goal was to take a big step in the right direction by getting solid at 5.9. Over the summer I started to feel like it might be happening. I seemed to be doing well on 5.9 climbs in the Gunks. And aren't Gunks ratings steeper than everywhere else? I started to entertain the notion that maybe I could walk up to a 5.9 anywhere and feel confident that it would be no problem.
But then I did some climbing in the Adirondacks. And I guess I got my ass kicked a little bit. The vertical crack climbing felt unfamiliar. I realized how narrow my Gunks-focused skill set really is. And I discovered that maybe the ratings in the 'Dacks are even stiffer than in the Gunks.
On day one of my recent two-day trip to the Adirondacks with Adrian, I was extremely grateful not to be leading the Poke-O Moonshine 5.9+ Bloody Mary. And I struggled to lead the 5.8+ P.T. Pillar, taking a hang and then a short fall.
On day two, Adrian and I decided to visit Upper Washbowl Cliff. I really wanted to hit the two John Turner classics on the cliff, Hesitation (5.8) and Partition (5.9-). I was also interested in the 5.8 link-up of Prelude and Overture, and the 5.6 Weissner Route. So there were plenty of possibilities available to us.
As we trooped up the hill to the cliff, we passed the single-pitch Creature Wall and found it quite wet. Nevertheless there was a party at the base and a guide setting up numerous topropes for a group.
This was a bad sign. I didn't expect crowds. Where were we, the Trapps?
But we were relieved to find no one at Upper Washbowl. The cliff seemed empty and the trail deposited us right at the base of Hesitation, John Turner's four-pitch route up the center of the cliff.

(Photo: working up pitch one of Hesitation (5.8).)
The crux pitch of Hesitation is the first. It ascends a corner with a crack at the back. Its appearance should have reminded me of my struggles on P.T. Pillar. I was also feeling a bit less than 100 percent after imbibing several of Lake Placid's fine Ubu Ales the previous evening. But for some reason no warning bells went off in my mind and I volunteered for the lead. I didn't intend to wuss out just because the previous day had been hard. I felt I needed to go right back at it. And this pitch used to be considered a 5.7! The new guidebook had upgraded it to 5.8, but note that there is no plus after the 8 on that grade. I figured I'd be fine.
In the end, I did get through it okay. I took no falls or hangs. But I found it hard and committing. The crack was too wide for jamming, I thought, so I mostly laid back off of it, feeling insecure. I had to work up the courage to trust my feet over and over again. All the moves worked out fine, but I took forever, worrying my way to the end.
When Adrian joined me at the top of pitch one he said he thought the pitch was pretty straightforward.
I asked him if he been able to jam the crack, as I'd found it too wide.
"Sideways," he said. "You have to turn your fist sideways."
Jesus, I thought, I really don't know how to crack climb.
No wonder I thought the pitch was hard. I had no idea how properly to climb it! I am such a maroon.
Even taking my incompetence into account, I find it kind of amazing that this pitch was long considered a 5.7. It seemed harder than that to me. It was much harder than pitch four of Gamesmanship on Poke-O. I still don't get it.

(Photo: a sun-bleached shot of Adrian at the end of the pitch two traverse on Hesitation.)
Pitch two, rated 5.7, was Adrian's lead. This pitch is where Turner felt the need to hesitate on the first ascent, and it's easy to see why. An exposed traverse with so-so feet takes you out to the end of an overhang. The climbing above is easy but there's no way to tell from below.
The traverse really isn't bad. The feet are thin at first but they get better as you move across and the pro is also solid until you reach the end of the roof. Still, it is exciting, and once you clear the overhang the easier climbing up and left to the belay point has precious little pro. I have to give Adrian credit, he managed to place two micro-nuts that I thought were good in the runout part of the pitch.

(Photo: The start of the 5.6 pitch four of Hesitation.)
The last two pitches are nice, but in my opinion less memorable than the first two. A long 5.5 pitch three leads to the final corner that is ascended by pitch four. After an awkward move or two to get established on the wall (see photo above), good positive edges on the right face take you to the top. It seemed to me to be fairly graded at 5.6, a fun end to an outstanding multipitch climb.

(Photo: Starting up the Weissner Route (5.6). First ascent 1935!)
By the time we found the right-side rap recommended by Lawyer & Haas and had a little lunch, it seemed like the day was already slipping away. I wanted to make sure we got to do the second pitch of Partition (5.9-), which the guidebook lists as the best pitch on the cliff. And truthfully I wasn't feeling like challenging myself all that much on lead any more. So I proposed to Adrian that we do the first two pitches of the Weissner Route (5.6), which would place us in a good position from which to climb the final pitch on Partition.
Adrian led pitch one, which is now graded 5.6 but historically was considered a 5.5. The crux comes at an obvious, square block that forms an overhang with a fixed piton underneath. Adrian puzzled over the move for a minute before powering up the crack on the left side. When it was my turn, I thought I actually found a more elegant solution, using the right edge of the block as well as the crack on the left. But I had to marvel at Fritz getting up this in mountain boots in 1935. And 5.5?? I've never been on a 5.5 with moves like this.

(Photo: Adrian almost to the top of Partition (5.9-), in the final off-width section.)
As I emerged from the easy, quite enjoyable 5.4 second pitch of the Weissner Route, I had no trouble finding Partition. It is a another Turner route so, no surprise, it follows a vertical crack in a corner. This corner is very imposing and it widens at the end to an off-width. The kicker on the day of our ascent was that it was also wet right before point where the crack widens. Once again we were looking at a route that had been upgraded by Lawyer and Haas in their recent guidebook, to 5.9- from 5.8+. It sure looked hard to me, steep and sustained, and there was no telling what that off-width at the end would be like.
I wondered if we could even climb it with the wetness but there was a party just rapping off and they said it wasn't too bad. Adrian was psyched to get on it so I graciously allowed him to lead it.
He didn't exactly make it look easy, but he got up it without any real trouble. All the way up he was very pleased with the hand jams.
When the rope came tight on me, I knew it was now or never. I was going to jam my way up this crack or I wasn't going to get up it. And for the most part it was a success. Hand jam after hand jam, the crack was very secure. It seemed to go on forever. I hadn't taped up, and the back of my right hand got ripped up a bit, but not too badly. As I finally neared the off-width I thought I might be on my way to a send, but then the crack became very wet. I tried to jam it and my hand slipped right out, causing me to take a fall oh so close to the finish.
Trying again, I slipped out once more.
As I paused to rest I looked around and realized I was failing because I was missing a diagonal, ramp-like series of dry holds on the right face of the corner. I had gotten tunnel vision, and had become for the first time in my life TOO focused on the vertical crack, ignoring the other holds.
Once I woke up and saw the holds to the right, I got easily up into the off-width, which ended up requiring no off-width technique. There are good holds at the top of the slot and the final move out of it plays out like a Gunks climb, with a couple horizontal jugs providing the means of escape.
Partition was the pitch of the weekend, we both agreed. So awesome. I want to go back and lead it clean. And even though I fell in the wetness while seconding it, I view my time on Partition as a success. Maybe I'll look back on it as the pitch that finally made me into some kind of crack climber.
What do you get for 72?

My parents have been married 71 years. SEVENTY ONE YEARS. They met when a group of kids came over to my mother's apartment in the Broadmoor on Connecticut Avenue. My mother remembers the exact day- April 8, 1932. She was just fifteen. It was tricky figuring out how to ditch their friends, but my mom had free passes to the movies at the Avalon, and she gave them away to the others so she and dad could be alone. That was it. They were officially a couple. They went to Western High School which is now Duke Ellington over in Georgetown. Sometimes they skipped school. My father had saved all his money and bought a Model T, and they would go on picnics. My Yiya always packed her Georgie a big lunch, but she didn't know it was being shared. At one point my grandmother shipped my mother off to her sister in Ohio, but this didn't work. My mother came back still in love.
My parents eloped on Memorial Day in 1935 to Elkton, Maryland. Dad’s buddy, Fred came along as a witness, and they drove in a 1932 Desoto convertible. My mother was 17, and dad was 18. They shouldn't have done it. She was not a Greek, and this was a Big No No back then. As a wedding present, Fred took them out for a fried chicken dinner at $1.25 a head. Then they snuck back home to their own houses and tried to figure out what to do next. About a week later a fellow in Havre de Grace saw their wedding announcement in the paper, and he called my Papou. The cat was out of the bag, and my father was thrown out of the house, and the family. The entire Greek community was banned from hiring him in hopes that he would give up. My dad did not give up. He got a job; he found them a place to stay. When my older brother, Peter was born, they named him after Papou which was the tradition in Greek families. (yes, that’s the deal with all the same names) My father took the baby to see his parents, but my mother wasn’t included. It wasn’t until after my sister was born that my Papou even met my mother. He would come to the Hollywood Inn, and help my dad make hamburgers for the weekend customers. And it wasn’t until my brother, Roger was born that Yiya finally came to see her and the new grandson in the hospital. I guess even Yiya had to throw in the towel after 6 years and 3 kids.
My mother took it all in stride. She was and is the peacemaker. She does whatever it takes to help everyone get along, or to make my Dad’s life easier, and that must be part of their secret. I know it has not been easy all these years by any means, but they are still together. After 70 years, I remember commenting to my father on the longevity of their relationship. He was standing on the front porch at the time, and looking off into the distance he said "You know, your mother is my best friend." He paused to let that sink in as he rarely says anything so sentimental. I was a bit stunned myself.
"Well, that's so nice, Dad," I managed to get out.
Then, putting things into perspective with his irrepressible sense of humor, he said " Of course, most of my other friends are dead."
Now that's the dad I know and love.
Saturday, June 21, 2014
Cornish-Windsor Covered Bridge
 I couldn't visit the New England area without taking pictures of at least one covered bridge. Unfortunately, we only saw one that I could take a picture of. It was an awesome one though! If you click on the picture above, it tells how it is the longest wooden bridge in the US and some other history.
 This alone made the visit here worth it! The river separates Vermont and New Hampshire.
  I love what it said above the bridge too.
 Isn't it just beautiful here? It's like a fine painting everywhere I look. I am enjoying our time here so much!
Living the life in Vermont!
Thursday, June 19, 2014
your last chance at free gear for a month!
Tomorrow at midnight I'll draw a member's number and give away your choice of aBlue Ice Warthog or a Octopuss pack. But you must be a member of the blog to get drawn.

Friday, June 13, 2014
Shops
 Many of the shops in Old Town were first residents, some over 200 years old. There are still people that live over their shops or behind them.
Tuesday, June 10, 2014
Ride Prep Numerology

With snow still on the ground and brevet season upon us, New England riders are frantically counting weeks, playing with numbers, and putting together training plans. While I am not interested in long brevets, I would like to trythe local Populaire, which is coming up in 4 weeks. A Populaire is a self-supported ride of around 100K (65 miles). Normally I would not be doing anything special to prepare for that kind of distance, but we've had a tough winter, and I am out of shape compared to this time last year. The situation is made more interesting by the treacherous pseudo-proximity of the start. The start of the local brevets is close enough to make it embarrassing to drive or hitch rides to it, yet far enough to add significant milage to the brevet distance. For me, riding to the ride will turn the 100K into 100 miles when all is said is done. So here I am, back on my roadbike and praying it won't snow again, as I engage in some ride prep numerology.
How does one prepare for a 100 mile ride? The topic is pretty well covered by riders with far more experience than me, and when readers ask me this question I normally refer them to other sources. For example, this guide by the Blayleys is a good place to start.
Generally, the guides and training plans stress the importance of building up the milage gradually - recommending anywhere between 4 and 10 weeks to work up to the ride, depending on your fitness level. As far as distance, a common theme is that you should be able to do the milage of the ride you're training for in the course of a week. In other words, if you are aiming for a 100 mile ride, you should be able to ride 100 miles a week.
This advice works for a lot of people. But it helps to know yourself as a rider when applying it to your own training. For instance, from experience I know that I can do 100 mile weeks more or less effortlessly, yet still be unprepared for a 100 mile ride. To get from a place where 50 mile rides twice a week (or even three times a week) are fine to doing 100 miles in one go is difficult. Interestingly, most riders I speak to report the opposite experience: It is hard work building up to 50 miles, but once they pass that mark things get incrementally easier. For me, it gets incrementally harder.
For someone like myself, it makes more sense to focus not so much on building up the weekly milage, as on building up the milage of individual rides. And a good 4-week training plan (starting from some, but not much riding) might look something like this:
Week 1: 20-20-40-20
Week 2: 50-50
Week 3: 60-40
Week 4: 70-30
Some might feel that if a rider is capable of following this schedule, then a 100 mile ride should not present a challenge to begin with, but it just goes to show how different we all are. Getting to know my strengths, weaknesses, and the patterns I follow when getting into riding shape, has been educational - and I am just scratching the surface. I would love to ride the Spring Populaire (on the clock this time!), and I hope the numbers - and the weather - work in my favor.
Saturday, June 7, 2014
Pickle Ball and Bowling Fun
We've had quite the crew here for pickle ball! There is a family that has about 12 extended members that has joined our pickle ball fun. That has probably doubled the normal numbers. That means you sit out an awful lot waiting to play a game. That was ok with me today though because we did some bowling in the afternoon so I needed some energy for that.
Not that it helped me any, because I still didn't do well with the bowling. We went with a group from Torrey Oaks and with Faye and Ken. Poor Faye and Ken got stuck with us and while they bowled well, we did not. Although Austin did come in second the last game. He was doing great that game! We had fun even with the stinky scores!

Stan and Ken taught Austin some moves, so now he's taking the game seriously!

Faye and Ken:

Stan and Sally:

Even after a day full of activities, Austin wanted to go and join the Y here. He stayed and worked out for two hours. I'm hoping this means he goes to bed sometime soon tonight due to being worn out!
Living the life in Sunny Florida!
Not that it helped me any, because I still didn't do well with the bowling. We went with a group from Torrey Oaks and with Faye and Ken. Poor Faye and Ken got stuck with us and while they bowled well, we did not. Although Austin did come in second the last game. He was doing great that game! We had fun even with the stinky scores!
Stan and Ken taught Austin some moves, so now he's taking the game seriously!
Faye and Ken:
Stan and Sally:
Even after a day full of activities, Austin wanted to go and join the Y here. He stayed and worked out for two hours. I'm hoping this means he goes to bed sometime soon tonight due to being worn out!
Living the life in Sunny Florida!
Friday, June 6, 2014


 Padre Island National Seashore
Wednesday, June 4, 2014
Double boots

I have probably spent more time in plastic double boots that any other style of mountain boots. Two decades to be exact. I was climbing in leather single boots before that for the most part with the occasional foray into leather doubleboots. But the older and better double leather boots were heavy. Really heavy even compared to a good single boot and a Super Gator.
So what I ended up with was a very good pair of leather single boots (Haderer) and a custom pair of Carmen/ChouinardSuper Gaters that weremodified by addingmore insulation (synthetic pile) and a zipper down the front that was backed with flaps and Velcro.
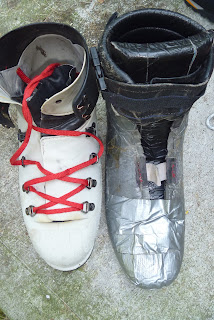
Once I got into a pair of Kolfach Ultras (shown above) I never looked back. Even if that did require a few layers of mole skin every week during the first winter season climbing andguiding in them.
So 30 years later you might ask how did those original plastic boots compare to what we have now? A recent conversation on a Internet forum made me ask the same question myself. But this time I wanted a more complete answer. Some times we get caught up in the newest, lighter, better, warmer and eventually more expensive product and loose sight at what we once had. It is called institutional memory. This blog is one way I have tried to keep our climbing history and its institutional memory alive.
Sometimes it is not better to reinvent the wheel every few years. It might actually be better to build a better tire for that wheel and take advantage of the best technology first.
If you look at the original idea behind double boots the biggest advantage is to keep your boots (inner boot at least) unfrozen and if required dry on multi day outings. You can put the inner boot in your sleeping bag and dry it out over night or at least keep it from freezing if needed.
The disadvantage of double boots is that they add volume to your feet. Volume means extra warmth everything else being equal. But as we all know nothing is ever "equal".
So if we have a huge volume boot you have warm feet. A Sorel or other double layer cold weather bootsare a good example.

Warm butseverely lackingon most technical ground.
So what is really required is a certain level of warmth but at the same time the real key is to keep the over all volume of the boot as compact as possible so it is easier to climb technical ground in.
Make sense?
Big volume for warmth.
 Small and sensitive to climb technical ground in
 So some where in between we should be able to come up with a double boot that is both warm and sensitive. But it isn't as easy as you might first expect.
A multitude of materials to make a boot from these days. Plastics, fabrics and the old stand by, leather. And all have advantages and disadvantages.
So first I think to have the best boot you need to look at the last. The last describeshow the boot interior is shaped. Currently we have literally bath tube shaped lasts (some plastics) and very ergonomic shaped lasts that match the foot almost perfectly (again some plastics). And boot lasts that are every where in between.
In the old days a cobbler or boot maker would have literally hundreds of hand carved lasts. Once measured and your foot matched to a specificlast the boot fit could well be phenomenal. With the ability of good leather to mold to your feet the fit just got better with use.
With a boot built to your foot the amount of insulation added to the bestdouble boots simply made the warmer. With a generic boot last the boot just got heavier than required and may or may not have gotten warmer for your foot.
The answer for that was "give them a bath tub" and let the inner boot take up the slop. That would give you a warm boot if the inner boot and bath tub last actually fit your foot. But it was also heavier than required if the last had been done correctly to fit your foot.
It is not happen stance that the best lasts on good leather double boots like a Haderer double or a plastic boot like theDynafit TLT look like your foot.
 This isthe best example I can easily show you of what I am trying to convey on boot lasts. The Koflach Arctisis over size and bath tub shaped. The TLT 5 is very anatomical lasted. Even with just a ski boot sole the TLT5 is easier to climb in for feel.
 I have heard a great manycomments on how cold the TLT Series of boots is compared to other down hill ski boots. I'll challenge those comments. You really need to look at the amount of insulation before you start to make comparisons for warmth.
How do youmake a boot warmer the easy way? Add volume. This is the answer from Kolfach with two different boots, both the same marked shoe size. In this case a 11.5 US.


So let me back up a bit here.
I have summited Denali a couple of times in Koflach Ultras with foam inner boots and simple nylon knee high gaiters. I have also turned aroundat 17K on Denaliin really cold temps with the same boots and had really cold feet. But the issue wasn't that I didn't have warm enough boots. I did. The reality was the temps were too cold for me to be climbing.(no one else summited that week either btw) My feet getting cold were just the first sign of that cold. That and a thermometer that bottomed out during the night at 17K.
So when it comes to double boots I think there is a distinct disconnect between what the manufactures make us and what we really need.
La Sportiva Spantiks seem to be the most common boot for winter climbing in Chamonix by a huge margin.
Some type of double boot and generally a insulated over boot seems tobe required (or at least suggested) for Denali. More likely a Olympus Mons can be used above 14K on Denali in early spring and over kill later in the season. And a Spantik won't be enough boot for Everest or K2 or winter climbing in the Himalaya. There are and should be options forvolume and sensitivity.
 Current Koflach "Guardian"But actually the last gen Ultra shell, which was/is an excellent boot.
If a 30 year old Kolflach Ultra will get you to the top ofany Alaskan peak, and keep your foot warm and dry how much more warmth do you need? My answer would be none. If I need a warmer boot I can use a Spantik or a Scarpa 6000 which both have a bigger volume. The Spantik slightly larger than the 6000 by what I can tell. And just a tiny bit warmer as well form my experience. But when you start getting cold feet in either of these bootsisn't going to be a boot issue but your hydration and food intake is my guess. The Olympus Mons and its close mates made by other brands are the next and final step up for cold feet btu the boots are huge!
So what I think is missing is a totally different boot.
One with the volume or something similar to a old Koflach Ultra or better yet the newest TLT 5s.
Modern material, fabrics, plastic, leathers,open and closed cell foam all make great materials to work with. San Marco made a single boot in the '80s that had a plastic lower and a leather upper. It would be easy enough to come up with something similar now. Think of a Nepal Evo with an anatomically cut plastic lower and leather upper and a thin, easily heat formablefoam inner boot?
It is a boot that would easily replace the Spantik everywhere but Denaliand the greater ranges. But perfect in the rest of Alaska or Mt Blanc most of the year. I suspect it would bethe boot of choice for everyone from the Canadian Rockies to Chamonix if done right.Basically a boot that we all really need but that no one has even thought about making. Might be because simply no one asked until now.
These days I don't care how good the outer boot is or how good the anatomical shape of the last is. If your inner boot isn't easily heat moldable you are behind the curve.The liner needs to be air permeable as well. We can do better than a VBL. But the innercan not retain any moisture. It is possible. But itis frustrating to see all this technology out there and no one taking advantage of it. I think it is too easy for the boot designers and manufactures to get tunnel vision. instead of going back to the basicsand requirements at thedrawing board level
A short design list for the new doubleboot I want made:
Less over all volume, more akinto a high quality technical single boot.
Double boot so you can dry the inner or keep the innerfrom freezing
simple inner boot lace system for fit
Lace system for the outer shell so it is one handed and most importantly reliable (no Velcro it wears out)
Anatomical last on both inner and outer so you use what insulation you do haveto best effect
Plastics and synthetics for the lower boot for waterresistance.
Upper of fabric or leather for a close and flexible ankle fit
Split the insulation between the inner and outer boot so the fit can be optimised in the inner but the outer offers good insulation above and below the sole
Use the smallest sole lugs and stickiest rubber technical climbing soles possible.
Honey comb carbon mid sole for rigidity long term and most importantly warmth through the sole

As much as I really like the "super gater" boots they are a design dead end. All of them. Simple reason. The newest pant fabrics allow the pants to be easily used as a breathable gaiter now. Adding a gaiter, no matter the material, slows the moisture coming out of the boot and slows theevaporation. So the attached gaiter is not a help in design as you might first think,

Our climbing clothing, from boots to hats are really now more than ever a system. Attached hoods on the base layer, help us eliminate one additional layer. Mid layers with attached hoods allow us to use a lighter mid layer for warmth.
Boots and the gaiters we use are a part of that system as well. As are gloves and the gauntlets on the gloves and seals on the jacket sleeves.
Gaiters on the boots aren't required and in fact lower the performance of the boots. Remember the basics..."you must stay warm to stay dry". Adding a feature that keeps you from staying dry or thatslows the drying is a feature you don't need.
 double click this one to see them all
Any of the current boot makers have all the technology to make the boot I describe and market it for $700 or less than the current price tag requires on some of the boots today.
These are the two lightest true mountaineering boots available that Iknow of.
La Sportiva Trango Evo Extreme GTX 2#3oz 992g
Scarpa Phantom Ultra new model 2#3.5oz 1006g
1000g or less in a size 45 four season mtn boot is a magic number.
Here is the list and pictures of the current double boots that I can lay my hand on easily.
And a few odd ball combinations that I have used. Check out the over all weights and the inner boot weights.
I know it is possible to build a light weight technical double boot in my size (12 US/45/5 Euro) that would come in under 1000g per boot. And be the warmest and best climbing technical boot currently available. But I am shocked no one is doing it yet.

Euro size 45.5
La Sportiva Spantik 1370g
liner 252g
La Sportiva Spantik with a Baruntse liner1290g
liner 172g

La Sportiva Baruntse 3#2.5oz / 1503g
liner 172g

Euro size 46
Scarpa Phantom 6000 newmodel 1230g
liner 234g
Scarpa Phantom 6000 Baruntse liner 1200g
liner 172g

US size 11.5
Scarpa Omega 1110
liner 140g

Scarpa Inverno 1450
liner 318g

Koflach Arctis Exp 1440
liner 462

Koflach Degre 1160
liner 184g
Koflach Ultra (1980 vintage, white) 2# 10oz or 1190g total
Kastinger foam liner 234g

29.5 Mono
Dynafit TLT 5 Performance size 45.3-29.5 mono, (no tongue)1210g
TF liner 232g
TLT 5 Mountain TF 1200g (no tongue)
TF liner 232g
All the current double boots are within ounces of each other. 1110 being the lightest..the Scarpa Omega. And the Kolfach Arctis the heaviestand likely the biggest boot by volume@ 1440g. Volume wise the Arctis compares to the Spantik. And is bigger imo than the 6000.I am still impressed by the original Ultra now called the "Guardian" by Koflach. Sadly it seems to be soldover sized with the Arctis' liner. That shell, properly sized, with an Intuition liner would still be one of the best climbing boots available and around the 1100g or less instead of the 1258g Koflach lists.
More here on the Kolflachs:
http://www.koflach.com/en/parsepage.php?tpl=tpl_index
More on Scarpa's plastic boots here:
http://www.scarpa.co.uk/Products/Mountain/high/
Bottom line here? Some really good cold weather boots available today and all of them climb well on ice. The price point of the plastic boots make them a reasonablealternative if the $700+ is a little hard to swallow on the most popular models.
I have been turned around with cold feet but I have never been turned around on technical ground because of wearing plastic boots. The temps that did stop me would still do so in a Spantik or a 6000 today. I found it easier to climb 5.10 rock in a pair of the old Ultras than I do in the bigger volume Spantiks.The reason is simple..less volume means a better climbing and easier to climb in boot. Plastic boots make sense on hard technical rock or vertical ice in cold conditions if you can get a decent fit in them. If I could get my hands on a pair of the current production Koflach Guardian's easily, I'd be climbing in them this winter instead of my 6000s or Spantiks.
That doesn't say a lot for the current state of the art in double boots imo when a 30 year old boot technologyand1/2 the retail price of the upper end "state of the art models" available is thebetter option most days out today.
I'm lucky enough to have almost any double boot available to me. But if I had to choosejust one pair of mtn boots for every condition, any seasonand mtn range...it would be a rather old school pair of whiteplastics from the current Koflach production run.
If the idea of a ultra modern, super light weight and lowvolume double boot interests you, make sure to add your own comment to this blog post. More on the idea here:
http://www.ukclimbing.com/forums/t.php?t=475986
Subscribe to:
Comments (Atom)